Quick answer
An excavator maintenance schedule should run on machine hours, not months. Follow the familiar marks: daily checks plus 250, 500, 1000 and 2000 hours. Each mark has its own work on oil, filters, undercarriage and grease. Exact figures always follow the maker spec for the model.
The best excavator maintenance schedule runs on machine hours, not calendar months. The hour meter is the real measure of how hard the machine has worked. This guide gathers the familiar marks — daily checks plus 250, 500, 1000 and 2000 hours — with the work due at each one, so you keep the machine running and cut down on breakdowns on site. Any exact figure such as oil capacity, torque or pressure always follows the maker's spec for the model.
What an excavator maintenance schedule is and why it runs on hours
An excavator maintenance schedule is a list of checks and replacements tied to hours of operation. A digger is not measured in kilometres like a truck. It is measured by working hours on the meter. A machine running two shifts a day reaches each service mark twice as fast as one on a single shift. That is why a calendar plan goes wrong. Working to machine hours puts oil changes, filter changes and greasing at the right time: not so early you waste money, not so late you cause wear. Every maker and every model has its own marks, so always check the manual that came with the machine.
Daily checks before you start the engine
The 10-hour mark, or more honestly the start of each shift, is the cheapest step yet the one that saves the machine most. The operator walks a lap around the machine before starting. Keep the order fixed so nothing is missed:
- Engine oil level and hydraulic oil level in the tank.
- Coolant level and windscreen washer level.
- Oil or water leaks pooled under the machine overnight.
- Track tension and the state of the shoes and rollers.
- Lights, horn, mirrors and the warning lamps on the dash.
- The air-filter restriction lamp and the dust cap.
This walk-round takes a few minutes. It catches leaks and low oil early, before they turn into serious damage.
The first 50 hours — breaking in a new machine
A new machine, or one fresh from a pump or engine overhaul, needs a break-in mark. During this period the parts are still wearing to fit each other. Fine metal particles are produced more than normal. That is why many makers ask for an early first oil and filter change, sooner than the usual cycle. Avoid sudden heavy loads and let the oil warm before hard work. Skipping the break-in mark is the fastest way to shorten pump and engine life.
The 250-hour service
The 250-hour mark is usually a light one, done quickly on site. The main job is changing the engine oil and the engine oil filter. These two wear fastest because the engine takes constant heat and dust. While you are there, drain the water trap in the fuel bowl and check the air filter. Check the belt tension and glance over the flexible hoses. Write down the hour reading at the change so the next one is timed right. Do not wait for a warning lamp; the lamp often lights up too late.
The 500-hour service
At 500 hours the workload grows a little. Beyond engine oil and filter, you change the fuel filter and inspect the hydraulic system closely. The hydraulic return filter is often changed at this mark depending on oil condition. Check the travel final-drive oil and the swing motor oil. Clean the cooling fins on the radiator and oil cooler. Caked site dust makes the machine run hot and weak. This is also the time to re-torque the main bolts to the value the maker sets for the model.
The 1000-hour service
The 1000-hour mark is a medium service, so plan ahead and gather parts first. Change the travel reduction gear oil and swing gear oil if they are due. Inspect the whole undercarriage: tracks, rollers, idlers and sprockets. Replace the air filter if it is heavily fouled; do not just keep tapping the dust out forever. Check the battery condition and terminals. Look closely at the ram rods and cylinder seals for weeping oil. Note every abnormality so you can plan the change next time and avoid a sudden stop.
The 2000-hour service
The 2000-hour mark is the big one, the most time and money in the year for a busy machine. The heaviest job is changing the hydraulic oil and flushing the tank. Dirty hydraulic oil is the number-one cause of pump and valve failure. When you change the oil, change every hydraulic filter in the system as well. Check main pump pressure and pilot pressure against the maker's spec for the model. This is also the time to inspect the control valve, the oil cooler and the high-pressure lines. Do not cram this big mark into one rushed afternoon.
A quick summary table of the schedule by hours
The table below is a general frame to picture the plan. The exact marks and jobs always follow each model's manual.
| Hour mark | Main work | Note |
|---|---|---|
| 10 h / daily | Check oil, coolant, leaks; grease the pins | Do it before starting |
| First 50 h | First oil and filter change during break-in | New or freshly overhauled only |
| 250 h | Change engine oil and oil filter; drain water trap | Light mark, done on site |
| 500 h | Change fuel filter, return filter; clean coolers | Check belt and hoses |
| 1000 h | Change travel and swing oils; inspect undercarriage | Gather parts first |
| 2000 h | Change hydraulic oil, flush tank, change filters | Measure pump pressure, check valve |
Oil and filters: the right order to change them
Changing oil and filters looks simple, but the wrong order spoils the job. Drain the oil while it is still warm so the debris flows out with it; do not drain it cold and thick. Remove the old filter and smear clean oil on the new filter gasket before fitting. Tighten the filter by hand until the gasket touches, then add the turn printed on the filter. Fill with the correct fresh oil, start up, idle, and check again for leaks. The cycle detail sits in our oil and filter change cycle guide, worth reading alongside this one.
Hydraulic and return filters — why they cannot be skipped
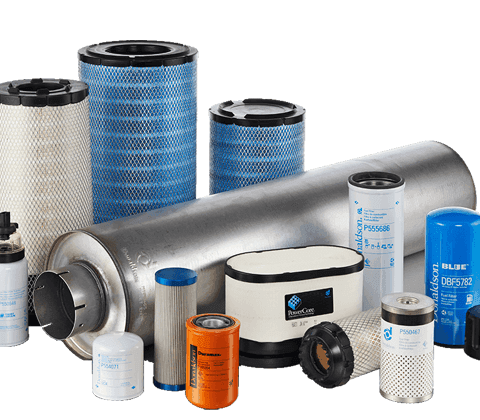
The hydraulic filter keeps the oil clean before it reaches the pump and valves. A single small grit particle through a pump clearance is enough to scratch the rotary group. So the hydraulic filter is the cheapest guard for the whole expensive system. A clogged filter sends oil short through the bypass valve and carries the dirt with it. Change it on cycle and pick a filter with the right rating for the machine. Việt Trung Hải stocks many hydraulic filters for the common models. Do not chase cheap filters of unknown origin just to save a little money.
Hydraulic oil: choosing the right grade
Choosing the wrong hydraulic oil hurts more than a slightly late change. Oil too thin leaks inside the pump; oil too thick makes the pump heavy in cold weather. Common grades such as VG 46 or VG 68 suit most machines, but still follow the maker's advice. Climate and season also affect the grade you pick. Never mix two oils of different base in the same tank. Our choosing hydraulic oil guide goes deeper on reading the spec and matching it. Good oil paired with a good filter is the pair that keeps a pump alive.
The cooling system and radiator
A hot machine is the quiet enemy of both the engine and the hydraulics. Dust on the radiator and oil cooler drives the temperature up where the operator hardly notices. Every service should blow the cooling fins clean from the inside out. Check the coolant level when the machine is cold; never open the cap while it is hot. Look at the fan, the belt and the water hoses for cracks or bulges. Coolant has a service life too, so change it per the maker's spec for the model. A cool machine runs strong and burns less fuel.
Undercarriage, tracks and rollers
The undercarriage takes most of the repair cost if it is neglected. Tracks too tight wear the sprocket and pins fast; too loose and they can throw when slewing. Check track tension each week and adjust it the way the maker shows. Look at the top and bottom rollers for seizure or weeping seals. Clear packed mud and stones from the undercarriage after each shift on soft ground. The detail on setting and adjusting sits in our excavator track tension guide, worth reading with this schedule. A sound undercarriage means the machine tracks straight and shakes less.
Greasing the joints — how to do it right
The boom, arm and bucket pins take heavy load and constant grit. Short of grease, the pins and bushings wear fast, making noise and play. Grease on the hour marks the maker lists, often daily for the bucket pins. Pump until fresh grease just shows at the joint; do not overfill and blow a seal. Use the right load-rated, water-resistant grease for a machine working outdoors. Wipe the grease nipple clean before pumping so you do not push dirt inside. A good grease gun is far cheaper than replacing pins and bushings.
Battery, wiring and lights
The electrics get little attention until the machine will not crank on a cold morning. Check the battery terminals, clean off the salt and coat them with anti-corrosion grease. Check the electrolyte level on flooded batteries and tighten the mount. Trace the wiring looms for chafing, rodent bites or oil damage. Work lights, horn and sensors must all work well enough for safe night shifts. Damp and vibration are the two things that wreck electrical joints fastest. One loose joint can throw a false fault code and cost you hours of searching.
Air filter and intake — site dust
Site dust is the killer of an engine when the air filter works poorly. One small hole in the element or a leaking seal lets dust into the cylinders and grinds them. Check the restriction lamp and the dust bowl daily in dusty places. Clean the main air filter properly; do not bang it hard and tear the paper. Replace the air filter by cleaning count or by hour mark; do not run it forever. Never run the engine with the air filter removed, even for a few minutes. Check the intake necks and elbows for leaks that let dust past.
The maintenance log: what to record?
Without a log, every maintenance schedule is guesswork. A simple notebook or a basic spreadsheet is enough to start. Each time, record the machine hours, the date, the work done and the parts changed. Note the small abnormalities too: odd noises, a fresh leak, a flickering lamp. The log lets you see trends, for example oil creeping down or temperature creeping up. It also helps you match part numbers so the next order is not mixed up. When you sell the machine, a full log even earns it a better price.
Common mistakes in running a schedule
The most common mistake is working from memory instead of machine hours. Next is bunching several marks into one session for speed, which leads to missed jobs. Many people only tap the dust from the air filter and never fit a new one. Some top up oil without finding why the oil is dropping. Using the wrong oil or the wrong filter rating also does slow, sure harm. Another slip is not warming the oil before heavy work on a cold day. Avoid these and you are already ahead of most machines of the same type on durability.
Genuine, aftermarket or used parts?
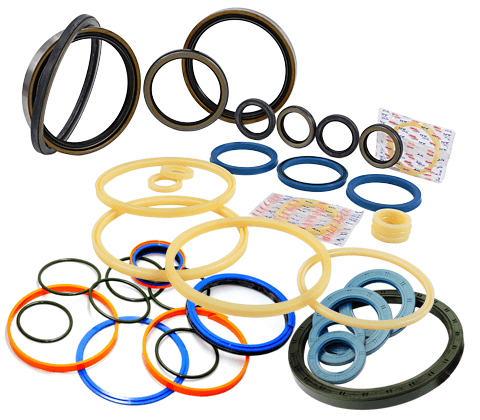
Choosing the right parts source matters as much as changing on schedule. Genuine parts give the best fit and longest life, right for core items like pumps and valves. Good-quality aftermarket is a sensible choice for common filters, gaskets and seals. Used parts can save a machine when you urgently need a hard-to-find item, but check them well. The risk is buying a cheap filter of the wrong rating or a seal of the wrong size. You can browse the heavy-equipment parts range at Việt Trung Hải to match numbers before ordering. The right source makes your maintenance schedule actually pay off.
When should you call a specialist or send it to the workshop?
Most of the jobs in the schedule the operator can do on site. But some belong to a specialist and to a clean environment. Measuring and calibrating pump and valve pressure needs gauges and the experience to read the numbers. Opening a rotary group or pulling a motor in the open dust invites dirt into the system. When the machine fades, runs hot abnormally, or shows metal in the oil, stop and call a mechanic. Early diagnosis is far cheaper than repair after the pump is badly damaged. Knowing your own limit is part of good maintenance too.
Keeping an excavator maintenance schedule steady is the cheapest way to make the machine last and cut breakdowns on site. If you need to match a filter, oil or part to the exact model, send Việt Trung Hải your machine model and pump number and we will check it for you. For the big marks, look up the maker's own service manual as well, for example the documents from Komatsu, to get the right spec for your model.
Key takeaways
- Run the excavator maintenance schedule on machine hours, not months, to change at the right time.
- Follow the familiar marks: daily, 250, 500, 1000 and 2000 hours.
- The daily check is the cheapest step yet saves the machine most.
- The 2000-hour mark is the big one: change hydraulic oil, flush the tank and change all filters.
- Log hours, work done and parts to spot failure trends early.
- Exact figures always follow the maker spec for the model.
Written by
Lê Minh Tuấn
Lê Minh Tuấn handles scheduled maintenance and machine longevity at Việt Trung Hải. He writes about oil, filters, service intervals and the habits that keep machines running reliably.
Related parts
The exact parts discussed above — send your machine model or pump code to match.