Quick answer
An excavator bucket splits into three groups: the shell (side walls, floor, back plate), the digging edge (teeth, adapters, side cutters) and the coupling (ears, pins, bushings). Each group takes a different load, so each wears its own way. Knowing every part helps you spot wear early and replace the right piece instead of swapping a whole bucket you did not need to.
An excavator bucket breaks down into the shell (side walls, floor, back plate), the digging edge (teeth, adapters, side cutters) and the coupling to the machine (ears, pins and bushings). Each part takes a different load, so each wears in its own way. Once you read the excavator bucket parts as three groups, spotting wear and replacing the right piece gets simple, and you stop paying to swap a whole bucket you did not need to. This guide walks part by part, with cues you can catch by eye, by hand and by ear while the machine works.
What parts make up an excavator bucket?
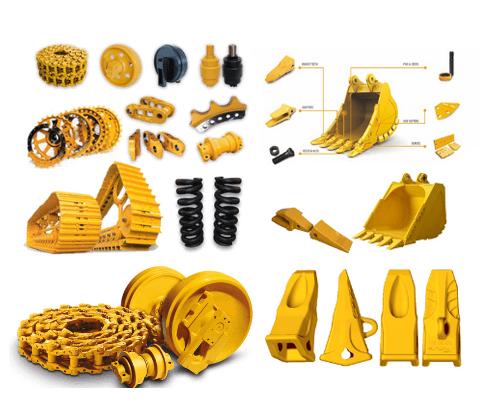
A bucket looks crude but splits into clear groups. The first is the shell: two side walls, the floor and the back plate. The second is the digging edge: teeth, adapters and side cutters. The third is the coupling: bucket ears, pin bores, pins and bushings. Sorting it into these three groups lets you narrow a problem fast instead of staring at the whole bucket.
The shell: side walls and floor
The shell is the main load frame and takes most of the reaction force when you dig. The side walls are the two steel plates that hold the shape and carry twist when you dig off-line or pry rock. The floor scrapes straight on the ground, so it wears fastest underneath. As the wall steel thins, the bucket dents, cracks at the lip and loses its shape.
Bucket teeth and their job
Teeth are the first point of contact with soil and rock, so they wear fastest of anything on the bucket. Good teeth let the bucket penetrate, cut push force and save fuel. When teeth go blunt, the machine has to press harder to bite, which heats the oil and burns more fuel. That is why teeth are treated as a scheduled swap, not a run-to-failure part.
Adapters: the link between tooth and bucket
The adapter welds or fits onto the bucket lip and gives the tooth its seat. The tooth locks onto the adapter through a small pin, so you change teeth fast without touching the shell. If the adapter wears, the tooth goes loose, rocks and rattles as you dig. A badly worn adapter drops even a new tooth quickly, so check the adapter every time you change teeth.
Side cutters and wall protection
Side cutters bolt to the two bucket edges, trim the trench wall clean and shield the wall corners from direct wear. They are sacrificial: they wear so the side walls stay whole. Many buckets also carry wear plates under the floor and around the corners. Replacing side cutters on time is far cheaper than patching a holed side wall.
Bucket ears and pin bores
The ears are two thick steel plates at the back with bores for the pins that join the stick and link. This is the area with the highest concentrated load when you pry and rip. Over time the ear bore goes oval, egg-shaped, which makes the bucket loose even when the pin is still good. When you inspect, do not stare at the pin and skip the bore.
Pins and bushings: the load-bearing joint
The pin is the steel shaft through the ears and the machine; the bushing is the sleeve between pin and bore that takes the friction instead of the parent metal. The pin-and-bushing pair sets how tight the whole joint feels. The bushing is sacrificial: it wears first to protect the bore and pin. Even, correct grease keeps the pair alive far longer.
Why do bucket pins and bushings wear fast?
The bucket joint works in mud, sand and water, exactly the heavy-abrasion setting. Starve it of grease and sand gets between pin and bushing, turning the joint into a grinder. Plenty of machines go loose early just from skipping the grease gun for a few days in a busy stretch. A failed dust seal also speeds bushing wear, so check the seal at the same time as the bushing.
Signs of worn bucket teeth
Tooth wear shows first in the tip shape: shorter, rounded blunt or worn off to one side. When you dig, a blunt tooth skates on the surface instead of biting down. You also hear a scraping note and see the machine straining more. Holding a worn tip next to a new tooth is the fastest way to decide on a swap.
Signs of worn pins and bushings
A worn pin and bushing show as a clunk when you change dig direction or set the bucket down. Sighting from the side, you see the bucket rock sideways while the stick stays still. Pull the pin and you usually find it waisted in the middle, with the bushing bore widened and oval. Light play you can live with, but heavy play flares the ear bore and drags in a costlier repair.
Signs of worn side walls and ears
Side walls wear as the sides thin, cracks appear at the lip or the wall even holes through. A simple test: stand in shade and see whether light shows through the wall. Worn ears mean the pin bore widens, the bore mouth flares and the gap to the pin grows clearly. Both say the bucket has worked hard and needs a rebuild on the calendar.
Wear reference by part
| Part | Common wear sign | Quick check |
|---|---|---|
| Teeth | Blunt, shortened tip, worn to one side | Compare tip shape with a new tooth |
| Adapter | Worn seat, loose tooth, rattling | Rock the tooth by hand, listen while digging |
| Pin | Waisted middle, reduced diameter | Pull the pin, turn and inspect the wear |
| Bushing | Widened oval bore, sideways play | Rock the bucket, judge the play by feel |
| Side wall | Thin wall, holes, cracked lip | Look for light through it, tap and listen |
| Ear | Oval pin bore, flared bore mouth | Compare the pin-to-ear gap |
How to inspect the bucket in the field
You can catch most faults without pulling the bucket. Work this order for speed and coverage:
- Set the bucket on flat ground, shut the machine down and lock it out.
- Look over the tooth tips and compare with a new tooth for wear.
- Rock each tooth by hand to find a loose adapter.
- Watch the gap at the pin and ear as you lift the bucket gently.
- Run a light along the side walls for cracks and thin spots.
- Feel around the pin seal for grease bleeding out mixed with sand.
Why understand excavator bucket parts before replacing?
Knowing the layout keeps you from replacing the wrong thing. A loose bucket can come from the bushing, the pin or an oval ear bore — three causes, three fixes. Change teeth but skip the adapter and the new teeth drop fast too. Knowing the bucket parts is the first step to maintaining it right and spending less.
Choosing bucket teeth: genuine or aftermarket?
Teeth come in two lines: genuine to the machine and aftermarket. Genuine parts are usually steady on material and life; aftermarket runs a range of quality, and a careful pick still serves well. Big makers such as Caterpillar publish guides on inspecting the tooth system and the wear point to replace, worth a look for scheduling. On hard rock, favour better tooth material to avoid constant swaps. Browse our heavy-equipment parts range to compare before you decide.
Bushings and correct greasing
The bushing takes heavy friction, so material and machining precision set its life. When you replace one, pick a hardened-steel bushing to spec so it holds clearance longer — this is where the ZVL Slovakia bearing and bushing line we distribute stands out on material and dimensional stability. The matching dust seal matters too; the PET Seals line holds grease and blocks sand well, sparing the bushing early wear. Whatever you fit, a steady grease routine stays the make-or-break for the pin-and-bushing pair.
When to weld up, when to replace?
Not every fault means a new part. A lightly oval ear bore can be welded up and line-bored back to size. A cracked lip or small hole in the wall can be patched and reinforced with wear plate. But once the steel is thin in many places, welding only buys short time; then a section swap or a new bucket is the better economy.
Common mistakes in bucket maintenance
The most common mistake is running teeth too far worn, which ruins the adapter as well. The second is skipping pin grease in a busy season, sending the bushing loose early. The third is watching the pin while ignoring the bore and seal. Inspect on a schedule; the detail is in our bucket maintenance guide.
How does a worn bucket affect the hydraulics?
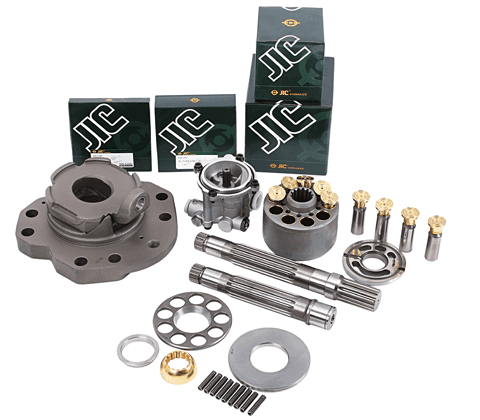
A worn bucket is not just the bucket's problem. Blunt teeth and a dented bucket make the machine press harder to bite, pushing working pressure high more often. Oil runs hotter, the pump and valves work harder, and over time the whole system wears. Keeping the teeth and joint in shape is an indirect way to protect the hydraulic pump and motor.
Tying it to whole-machine maintenance
The bucket is one link in the whole machine, so do not treat it apart when you plan service. On the same visit, check the undercarriage too; for example, correct track tension keeps the machine steady under heavy digging. Greasing, checking clearances and pinning up should happen together. A tidy service schedule means fewer surprise stops.
Replace the whole assembly or single parts?
The answer depends on condition and on the machine's age. If only teeth and bushings are worn, single parts are the cheapest, fastest route. If the walls are thin, the ears oval and the teeth blunt all at once, a new bucket or a section swap makes more sense. Weigh it against the machine hours left and the nature of the work, and do not chase the cheap item in front of you.
A word from the workshop
The bucket takes the most punishment, so make inspecting it a habit rather than waiting for failure. Each morning eye the teeth, each week check pins, bushings and seals, each month judge the walls and ears. Keeping spare teeth and bushings on hand keeps you from stopping mid-job. For help picking the right part for your machine, see our heavy-equipment parts range or talk to our technical team.
Key takeaways
- Split the bucket into three groups: shell, digging edge and pin-bushing joint for easy diagnosis.
- Teeth wear fastest, so swap them on schedule before the adapter is ruined.
- The bushing is sacrificial; steady grease keeps the pin-and-bushing pair alive.
- Bucket play can come from the bushing, the pin or an oval ear bore — three different fixes.
- Check the walls and ears with light and clearance, not just the pin.
- A worn bucket makes the machine press harder, indirectly straining the hydraulics.
Written by
Phạm Đức Thắng
Phạm Đức Thắng focuses on the undercarriage, tracks and the travel and swing systems of excavators. He writes about how these systems are built, travel and swing motors, and protecting the undercarriage from wear.
Related parts
The exact parts discussed above — send your machine model or pump code to match.